Features
AI Silhouette Generator
By Ofrai Editorial (Use Case Research)
An AI silhouette generator produces the backlit, shape-first images used in profile art, sunset portraits and shadow-puppet style work — solid dark subjects against a bright sky or window, where the outline does all the storytelling. In Ofrai you describe the pose and the backlight, then generate or edit from a reference photo. Because detail is hidden, these are among the most reliable images to generate.
New accounts include 1 free GPT Image 2.5 generation. Other models and video use credits.
Example prompts
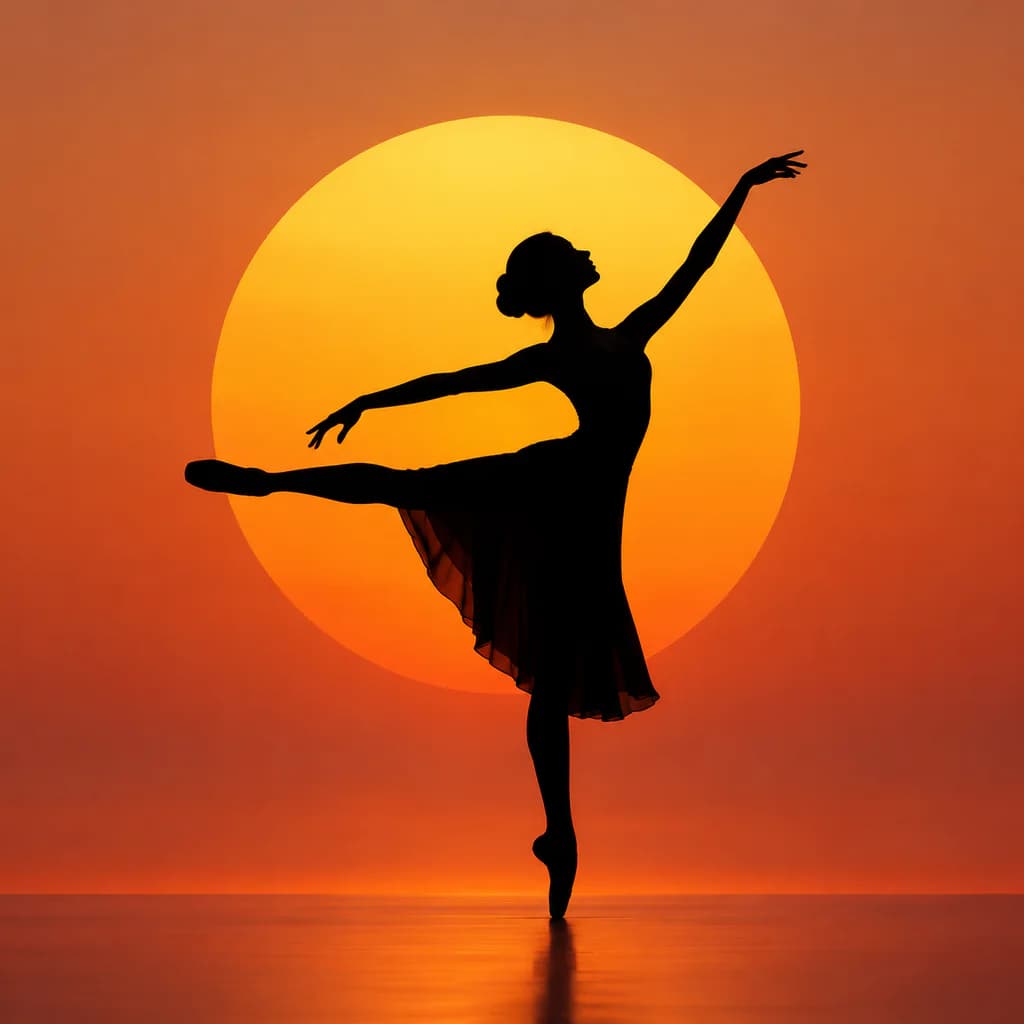
Pure black silhouette of a dancer in a graceful pose against a warm sunset circle, crisp readable contour, no interior detail, minimal poster composition.
Why the format works
A silhouette removes exactly the detail that makes generated images look generated: skin texture, fabric weave, eye direction. What remains is proportion and contour, which is a problem generators solve well. This makes silhouettes the most forgiving style on the platform and a good default when you want a portrait that reads as personal without exposing detail you cannot control. It is also why silhouette work scales cheaply: fewer details to resolve means fewer ways for a render to betray itself.
What a clean silhouette requires
Two conditions: the subject must be entirely darker than the background, and the background must be bright and even behind the subject. Say “solid black silhouette, no interior detail, no facial features visible, high contrast against a bright background”. Avoid gradients across the body — the moment the model introduces fill light on the subject, the silhouette becomes an ordinary portrait with a dark filter over it. Bright but textured backgrounds, such as a sky with clouds, work well because the tone variation keeps the shape readable.
Sun position does the work
The light source is the whole composition. “Sun directly behind the subject at eye level” gives a full-body shape with little detail. “Sun low behind at hip height” stretches long shadows and hides facial contour, which suits couples and families. “Sun behind and above” produces rim-lit hair and shoulder detail. Name the height and direction and the shadow will appear correctly rather than floating. Keep the sun low for warm colour, or higher for a cooler, more graphic result.
Profile, full body, or group
Profile silhouettes are the hardest to get right because a nose and chin in outline must read as a specific face, so upload a reference photo and let an editing model trace it. Full-body silhouettes are the most forgiving — proportion and pose carry the image. Group silhouettes need explicit spacing and contact instructions: “three figures standing shoulder to shoulder, all facing the same direction, no overlap ambiguity”, plus a stated count.
Using a reference to lock an outline
Upload a clear side-lit photo of the person and ask for a silhouette version with the exact head and shoulder line preserved. nano-banana-pro and gpt-image-2 are the best fit because they condition on your pixels rather than inventing a face from words. For custom designs, ask for a clean vector silhouette instead of a photo-realistic one — flat shapes render more predictably and scale without artefacts.
Photograph the reference flat, evenly lit and against a simple wall, because a busy background teaches the model the wrong outline.
Choosing the right model
Use nano-banana-pro for reference-led silhouette tracing from a real face. Use gpt-image-2 when the silhouette must obey a detailed scene brief with many constraints, such as a specific location and lighting. Use flux-2 for fast exploration of poses and sun positions at low cost. Use seedream-5 when the design needs paired elements — silhouette plus typography — in one frame. Test sun positions on the cheap engine before committing, since the lighting choice determines whether you need a detailed brief at all.
Failure modes and quick fixes
Interior detail leaking in: add “no fill light on the subject, fully black”. Ragged or broken contour lines: regenerate at a higher resolution and simplify the pose, since occlusion-heavy poses confuse the outline model. Shadows pointing the wrong way: state the sun height explicitly. Merged figures in a group: reduce to two figures, generate them, and add the third in a later pass. Judge success by the outline alone — squint at the image, and if the shape still reads, the render has done its job.
Worked prompts for four silhouette setups
Window frame: “Full-body silhouette of a woman standing with one hand on a sash window, backlit by low late-afternoon sun, the whole figure solid black with no interior detail, hard edge, the room falling into near darkness, 2:3, subject on the left third.” Golden hour ridge: “Silhouette of two hikers standing on a ridge line at sunset, sun directly behind at the horizon, figures entirely black, wide landscape frame, layered hills receding into haze, no lens flare.”
Stairwell: “Silhouette of a person climbing a spiral staircase seen from below, one skylight above, strong graphic shape, vertical 4:5, deep blacks.” Aquarium: “Silhouette of a child with a hand pressed to an aquarium viewing panel, backlit from the tank, fish light behind, 16:9, figure centred.” Each names who is in the frame, what is behind them, what the foreground is doing, and how it is framed. What you must never leave open is the interior of the figure, because any detail you invite will be drawn.
Sun angle, framing and the aspect ratio to set
Aspect ratio here is a compositional decision, not a delivery one. 2:3 and 4:5 suit a standing figure because people are tall; 16:9 suits wide landscapes with small figures and gives the light room to spread; 1:1 suits a graphic, icon-like shape with the sun dead centre behind the head. Because silhouettes crop badly, leave margin on all sides when you generate rather than tightening afterwards — a head that touches the top edge loses the entire effect.
If you want a rim halo rather than a clean outline, describe the light in frame terms such as “a thin bright edge along the left side of the figure,” because words like “backlit halo” tend to produce blur rather than an edge.
Matching the light across a silhouette series
The reliable method is to fix the light description word for word, reuse the identical preamble for every shot in the set, and change only the subject and the location. If the light does have to change — morning instead of evening, or a sun visibly moving across a series — describe it each time as an elevation rather than a time of day, because “evening light” wanders unpredictably while “the sun five degrees above the horizon” does not.
Upload a reference image when the same person or the same treeline has to carry across frames.
What a silhouette set costs in credits
Silhouettes are cheap to explore and comparatively expensive to finish. Because the output is mostly black shape against a bright field, flux-2 at low resolution is genuinely sufficient for deciding composition — you can judge a silhouette from a thumbnail. Spend the premium budget only on the finals you intend to print or publish, on gpt-image-2 or nano-banana-pro, where edge quality and the light gradient behind the figure actually matter.
A four-frame set usually needs ten to fourteen generations: four low-resolution composition probes, four finals, and a few spares. Each run shows its Ofrai credit cost before it starts.
Why resolution matters more when you print
Printing changes the order of priorities. A silhouette is a hard edge against a smooth field, which is precisely the case where compression artefacts are most visible: a poster-sized JPEG shows ringing and stair-stepping along the outline that nobody noticed on screen. Generate at the largest size you need rather than upscaling afterwards, because upscaled edges soften and no amount of sharpening brings them cleanly back. If the destination is a poster, check the printer’s bleed requirement and generate past the trim line.
If it is a vinyl cut or a laser-cut stencil, generate the shape large and simple, because it is the fine interior detail that snaps during cutting.
How this differs from portraits and sticker work
A silhouette deliberately deletes the face, the fabric and the surface, which is exactly why it generates so quickly and so cheaply, and also why it is the wrong tool when the brief is about who someone is. A portrait workflow optimises for expression, likeness and skin; this one optimises for shape against light. A sticker workflow imposes the opposite constraint: a sticker needs a thick uniform die-cut border and colour that survives being printed at 60mm, while a silhouette needs no border and is usually pure black.
Choose the silhouette route when the subject is recognisable by outline alone — a figure, a tree, a cat, a skyline — and move to another route the moment recognition has to survive without the backlight.
Examples
FAQ
- Can I make a silhouette of a specific person?
- Yes, by uploading a clear photo as a reference and asking for the outline of the head and shoulders to be preserved exactly while the image becomes a solid black shape. Reference-led models such as nano-banana-pro and gpt-image-2 follow uploaded structure better than text-only generation, which tends to invent a generic face.
- Why does my silhouette show facial features?
- Usually because the model added fill light on the subject, turning the result into a dark portrait rather than a true silhouette. State that the subject is solid black with no interior detail, no visible facial features, and that the contrast against a bright background is high. Simplified poses also help.
- What is the best aspect ratio for silhouette art?
- Use 9:16 for phone wallpapers and story formats, 3:2 or 4:5 for print and framed art, and 1:1 for avatars and logos. Pick one and keep it fixed across a set, because a family or couple series with mismatched ratios looks assembled rather than designed.
- Can I get a vector-style silhouette instead of a photo one?
- Ask for a flat vector silhouette with clean edges and a solid fill, and use a model that follows instructions closely. Flat vector shapes render more predictably than photographic ones and scale to any size without artefacts, which makes them the better choice for logos, stickers and print production.
- Why do my group silhouettes merge together?
- Figures merge when their outlines overlap ambiguously, because the model has to decide where one body ends and another begins. State the number of figures, their spacing and direction explicitly, keep the pose simple, and if it still fails, generate two figures, approve them, and add the next person in a separate pass.
- Can silhouette images be used commercially?
- Commercial rights depend on the model and model terms for the engine you select, so check the model page before publishing. A second consideration is likeness: a silhouette derived from a real person’s photo still resembles that person, so obtain consent before using someone’s outline in a product, brand or public campaign.
Related generators
- AI Poster Generator
- AI Sticker Generator
- AI Black And White Photo Generator
- AI Caricature Generator
- AI Chibi Character Generator
- AI Classical Portrait Generator
- AI Cozy Anime Art Generator
- AI Cozy Winter Wallpaper Generator
- AI Crayon Drawing Generator
- AI Fight Poster Generator
- AI Game Cover Art Generator
- AI Instant Film Photo Generator