Features
AI Chibi Character Generator
By Ofrai Editorial (Use Case Research)
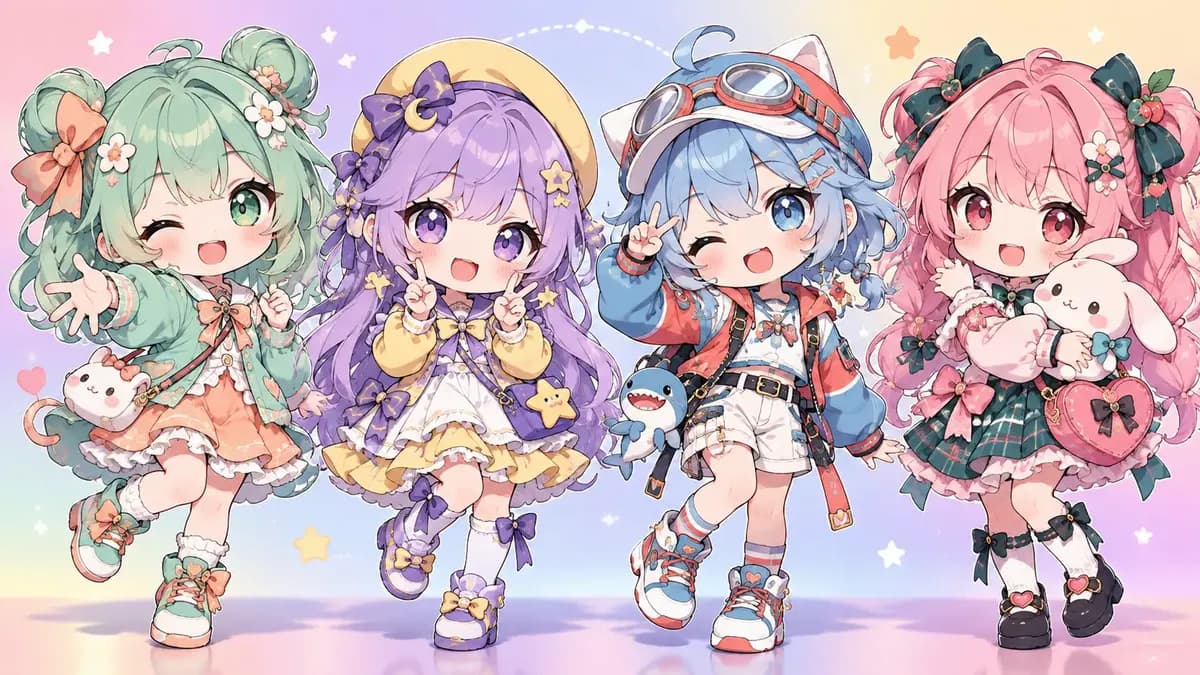
An AI chibi character generator designs original characters with a large head, small body and readable costume — the proportion that makes a mascot, sticker and game sprite work. Describe the character or upload a reference for the costume, state the head-to-body ratio, and generate in Ofrai Image Studio. The most common failure is a drifting ratio, so lock the proportion in words and repeat it at the end of the prompt.
New accounts include 1 free GPT Image 2.5 generation. Other models and video use credits.
Example prompts
Chibi character design, clean lines and color blocks
The head-to-body ratio that defines an AI chibi character
Classic chibi sits around three heads tall: a large rounded head, a compact torso and short limbs. Two heads is a sticker or bobblehead read, and four heads drifts toward ordinary stylised character design. State the number: 'three heads tall, head roughly one third of total height, small hands, short legs'. Repeat it at the end of the prompt, because models quietly normalise proportion when the rest of the description gets detailed.
Chibi as a character design system
Treat the character like a design system rather than a one-off. Fix four things: silhouette (hair shape, hemline, what sticks out), two accent colours, one accessory, and a face shape. Everything else — background, pose, small props — can vary between generations while the silhouette stays constant. That fixed silhouette is what makes a chibi recognisable at 32 pixels on a game HUD, so treat it as a hard requirement rather than a preference.
Expression and pose language
Chibi readability depends on clear poses and one clear expression. Useful vocabulary: 'arms raised in celebration', 'sitting cross-legged', 'waving with one hand', 'determined eyebrows, mouth in a small determined line'. Two-handed gestures and complex poses turn to mush at chibi proportions because hands are tiny; prefer one raised hand or a clear stance. For expression sheets, request 'four expressions in a row, neutral to joyful' and check that the head silhouette stays identical across all four.
Sticker and mascot-ready output
For stickers, ask for the production format directly: 'die-cut sticker, thick white outline, no drop shadow, centred on a plain white background, full body visible'. Skip the drop shadow — models add it by default and it makes the cut line unpredictable. For mascot use, request the character in a square frame with generous empty margin so you can place a logo or a wordmark underneath without cropping the design.
Which engine handles chibi cleanly
gpt-image-2 handles the constraint-heavy prompts this style needs — locked ratio, named palette, white outline — because it follows multi-constraint instructions most literally. nano-banana-pro is the choice when a real photo or an existing character sheet is the reference, since it preserves costume details. flux-2 gives cheap fast drafts while you settle the silhouette. seedream-5 produces the softest, most painted chibi look when you want illustration rather than sticker art.
Building a matching asset set
Merchandise and app sets need the same character several times, so generate one master chibi first, then reuse it as the reference for everything else. Keep the style sentence, ratio, palette and outline instruction identical across the set and change only pose, expression and background. Generate a turnaround and an expression sheet from the master; regenerating from scratch each time is the fastest way to end up with four different characters.
Fixing proportion drift and melted hands
If the head shrinks between generations, the ratio was described once and buried. Repeat it, add 'stylised super-deformed proportions', and put that phrase last. Melted hands come from tiny hand descriptions — say 'simple mitten-style hands with a thumb' for the sticker look, or 'five clear fingers' for a cleaner character style. Muddy joins at the neck are fixed by 'visible neck gap' or, for some styles, 'no neck, head sits directly on shoulders'.
Using a chibi character in motion
Once the character is final, animation is straightforward: take the master still into Video Studio as an image-to-video start and ask for one small action per clip. Chibi designs animate reliably because the silhouette is simple and the motion can stay subtle — a blink, a bounce, a wave, a small hop. Keep clips at three to four seconds and keep the same model and ratio across the set so the character does not drift between shots.
Five AI chibi character prompts with locked proportions
Mascot base: 'chibi mascot character, three heads tall, head one third of total height, small hands, short legs, rounded silhouette with a spiked hood, two accent colours of teal and warm yellow, one accessory of a lantern on the belt, front view, arms raised in celebration, clean flat colours, plain white background'. Sticker version: 'same character as a die-cut sticker, thick white outline, no drop shadow, centred on plain white, full body visible, small feet tucked together'.
Expression sheet: 'four expressions in a row, neutral to joyful, same character, same three-heads-tall proportion in all four, flat colours, plain background'. Game sprite: 'same character, small pixel-friendly silhouette, thick outline, limited four-colour palette, side view, running pose, transparent background'. Merchandise mockup: 'same character printed on an enamel pin, enamel gloss surface, gold metal outline, photographed straight on'. Every one of these repeats the proportion at the end, and that single habit is what keeps five different images looking like one character.
Aspect ratio and outline for sticker output
Generate in the ratio the asset needs: 1:1 for sticker sheets and sprites, 4:5 or 2:3 for phone cases and apparel prints, 16:9 for banners. For sticker production, describe the cut explicitly — 'die-cut sticker with a thick white outline following the silhouette, no drop shadow, no background' — because drop shadows are added by default and they destroy the cut line.
Batch four while settling the design, then generate the poses one at a time from the master, because a batch of four different poses will drift in proportion even with an identical prompt.
Credits for a mascot set versus a hero render
A single hero chibi render is a short job: three to five generations once the proportion and silhouette land. A usable mascot set is a different order of work. A character with six poses, four expressions, a sticker version and a turnaround is typically forty to seventy generations, because each asset re-tests the silhouette and outline. The economics reward one decision: render one master chibi, then use it as a reference for everything else.
That converts most of the set from a design problem into a variation problem, and variation is what the models handle cheaply. Draft every pose on a low-cost engine at modest resolution, approve them all as a set, and only then rerun the chosen poses at delivery size. Rejected poses are usually wrong in one of three ways — wrong proportion, a hand doing something unreadable, or an extra accessory — and each is a one-line prompt fix, so rerolling once or twice is usually enough.
Chibi versus mascot logos and cartoon design
Chibi characters are for anything that needs a body, a personality and a pose: stickers, app mascots, game sprites, merchandise, emotes, social avatars. A logo page is for marks that must reduce to a few millimetres and survive one colour: monograms, abstract shapes, wordmarks. Generated characters almost never work as logos because the detail that gives them character is exactly the detail that fills in when you scale down or embroider.
Cartoon character design, by contrast, sits at normal or slightly stylised proportion with normal facial features, which is a different prompt shape from chibi and produces better expressions at larger sizes. If the deliverable needs to survive being embroidered at four centimetres, design the silhouette first and treat colour as decoration. Chibi proportions of three heads are also not ideal for a logo lockup, where the head becomes an oversized blob. Two assets, two processes.
Exporting an AI chibi character set for merch and games
Plan the export around the production process, not around the preview. For merchandise, generate transparent-background versions with generous empty margin so the design does not touch the trim line, and ask for the character to be centred rather than filling the frame, because garment templates will crop. For games, keep the silhouette inside a square safe area and avoid thin protrusions such as antennae or a raised hand, which survive badly on a sprite sheet and vanish at small sizes.
Export at the highest resolution the engine offers and upscale the final, keeping line weight consistent across the set — inconsistent outlines are the fastest way to make a collection look assembled rather than designed. Name files by pose so a designer can find the right frame without opening each one.
Examples
FAQ
- What head-to-body ratio should a chibi character use?
- Around three heads tall for a classic chibi, two heads for a sticker or bobblehead read, and four heads drifts toward ordinary stylised character design. State the number in the prompt and repeat it at the end, because models normalise proportion when descriptions get long.
- How do I keep the same chibi character across images?
- Fix four things — silhouette, two accent colours, one accessory, and face shape — then reuse the finished master as a reference image for the rest of the set. Change only pose, expression and background while keeping the style sentence identical.
- How do I get sticker-ready output with a white outline?
- Ask for the production format explicitly: die-cut sticker, thick white outline, no drop shadow, centred on plain white, full body visible. Mention the no-shadow instruction because models add shadows by default and they make the cut line unpredictable. Export on white so the cut line stays predictable in design software.
- Why do the hands look melted in my chibi art?
- Tiny hands plus detailed finger descriptions. For sticker-style characters ask for simple mitten-style hands with a thumb; for a cleaner character style ask for five clear fingers. Complex two-handed gestures also fail, so use one raised hand instead. The same advice applies to small shoes and thin tails.
- Which model is best for chibi character design?
- gpt-image-2, because chibi prompts are constraint-heavy — locked ratio, named palette, white outline — and it follows multi-constraint instructions most literally. Use nano-banana-pro when the costume must be derived from a real photo or existing sheet. Keep the style sentence identical across the whole asset set.
- Can I animate a chibi character?
- Yes. Send the master still to Video Studio as an image-to-video start and request one small action per clip: a blink, a bounce, a wave, a hop. Keep clips to three or four seconds and hold the model and ratio constant so the design does not drift.
Related generators
- AI Cozy Anime Art Generator
- AI Action Figure Generator
- AI Avatar Generator — Consistent Faces
- AI Black And White Photo Generator
- AI Caricature Generator
- AI Character Sheet Generator
- AI Classical Portrait Generator
- AI Cozy Winter Wallpaper Generator
- AI Crayon Drawing Generator
- AI Instant Film Photo Generator
- AI Liminal Space Image Generator
- AI Luxury Photo Generator