Features
AI Instant Film Photo Generator
By Ofrai Editorial (Use Case Research)
An AI instant film photo generator has to sell the medium, not just add a filter. Real instant film has a hot centre, a vignette that eats the corners, colour bleed at the highlights, an uneven flash falloff, and a date stamp that sits in a fixed corner. On Ofrai you write those physical facts into the prompt in Image Studio, pick from gpt-image-2, nano-banana-pro, flux-2, and seedream-5, and generate at the frame's native square ratio. Grain and halation happen in the render; the white border and date imprint are usually easier and cleaner to add afterwards.
New accounts include 1 free GPT Image 2.5 generation. Other models and video use credits.
Example prompts
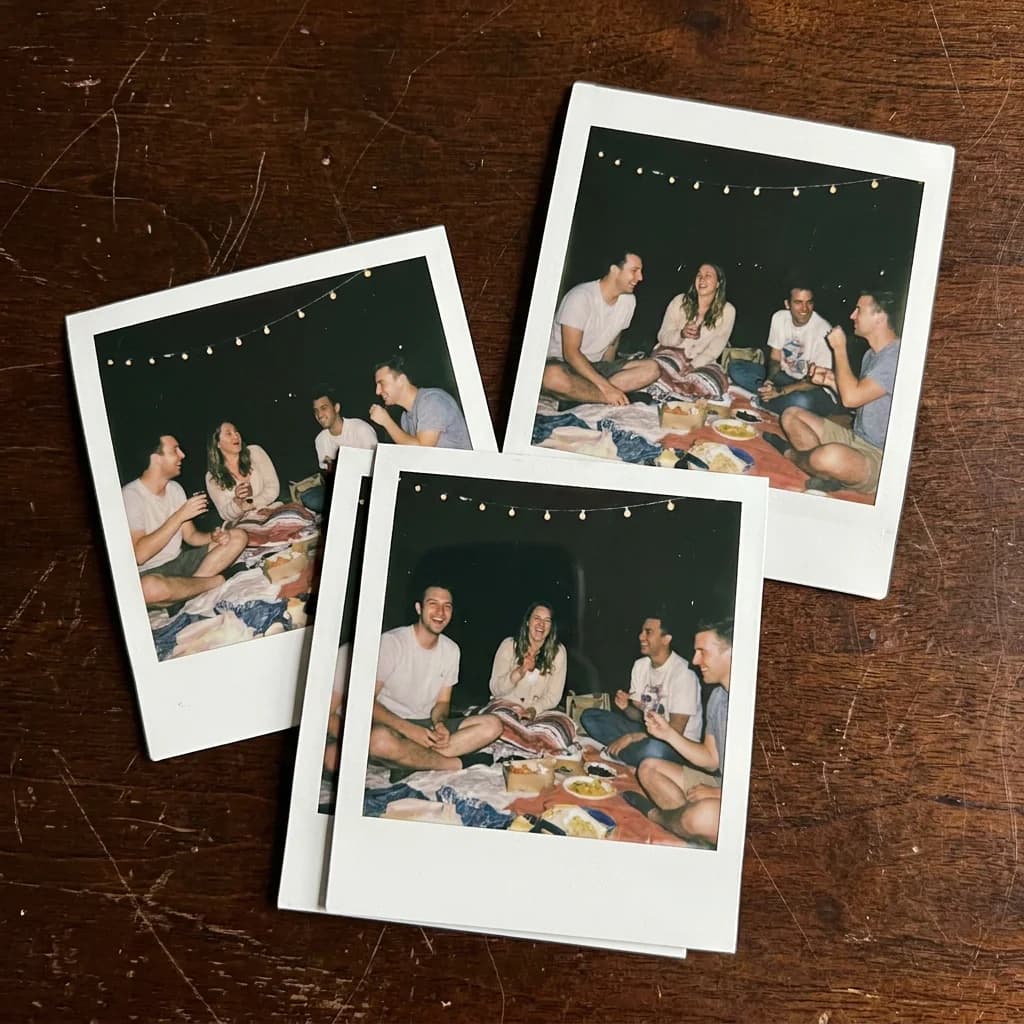
Three physical instant-film prints scattered on a dark wooden table, candid adult friends at a nighttime picnic, direct flash, faded colors and realistic paper shadows.
Describing the chemistry instead of the look
Prompts that say "retro film look" produce a generic warm filter. Prompts that describe chemistry produce something recognisable: "cyan and magenta dye bleed around bright highlights, uneven developer flow across the frame, slightly lifted blacks, warm amber shadows." Name two or three of those physical behaviours rather than a mood adjective. The same reasoning covers the frame itself: square 1:1 ratio, soft rounded corners, a narrow white border with a wider bottom lip on formats like Polaroid, and a slightly lower resolution feel than a modern DSLR.
Flash in the dark versus daylight
Flash at night and available light in the day are two different photographs, and mixing them is a common mistake. For flash, describe the hard falloff: "on-camera flash firing straight at the subject, background falling off into darkness two metres back, red-eye, hard shadow under the chin." For daylight, describe the softer, ambient version: "overcast daylight, no flash, gentle even exposure, slight blur in the background." Keeping one or the other explicit stops the engine from producing a mixed lighting scheme that belongs to neither.
Getting grain and halation that hold up
Grain that is described in the prompt survives; grain added afterwards looks like an overlay. Say "visible film grain, finer in the highlights and coarser in the midtones" and let the model place it. Halation is the glow around a bright light source and is the single most recognisable instant-film signature — name it directly with "bright bloom and red-orange halation around the window or flash". If halation is missing, the frame usually just has a warm cast, which is a colour grade rather than a film characteristic.
Adding the border and date stamp yourself
Generated borders are frequently lopsided and generated dates are usually wrong characters, so treat the frame and the stamp as a finishing step. Export at 1:1, then add a white border in any editor, and set the date imprint in a small monospaced font at the bottom right with a slight amber tint and partial opacity so it reads as burned into the emulsion. Doing this by hand takes under a minute and always looks more convincing than a generated one, because the alignment and character shapes are exact.
Portrait, party, and travel variations
Because the chemistry clause is reusable, one prompt skeleton can produce an entire set. Write the film description once, then vary the scene: a night party frame with flash, a beach daylight frame, a kitchen dinner frame lit by a window. Keep the film clause byte-identical across the set and change only the scene, and the whole batch will read as the same camera and the same stock. This is also the fastest way to build a coherent visual identity for a brand, album, or invitation set.
Which model renders film artefacts best
gpt-image-2 holds physical descriptions most literally, which makes it the safest choice when your prompt depends on named artefacts like halation and dye bleed. nano-banana-pro is the most reliable when you are reusing one long film block across a large set. flux-2 is cheap for testing whether a scene works in the medium before you render the final frames. seedream-5 tends toward a cleaner, more modern result and may need the halation clause doubled to actually appear.
Common failures and how to fix them
If the result looks like a warm Instagram filter, add the two or three missing physical terms — uneven flow, lifted blacks, halation — because a mood adjective alone will never produce them. If faces are soft, that is often correct for the medium, but if it bothers you, tighten the crop. If the colour is muddy, ask for lighter blacks and specify which channel should bleed. And if a frame looks great but the set does not match, you changed the film wording between calls; restore it verbatim.
Three instant film prompts you can use as written
Night party with flash: "three friends on a driveway at night, on-camera flash firing straight at them, hard falloff to black two metres behind, slight red-eye, a sharp shadow under the chin, uneven dark corners, cyan and magenta dye bleed around the highlights, lifted blacks, visible film grain." Daylight seaside: "two people on a pale sand beach at midday, flat available daylight, no flash, gentle even exposure, slightly bleached colours, warm highlights, soft yellowed shadows, fine grain in the highlights."
Indoor kitchen window: "one person holding a mug beside a window, natural light only, one side blown out, halation around the window, uneven developer flow, amber-tinted shadows." Each keeps the same chemistry sentence and swaps only the scene and the light, which is the reusable part of the whole exercise.
Frame ratio, border proportions, and the finishing crop
Instant frames are square, so generate at 1:1 and add the border afterwards instead of cropping a rectangle. Export slightly larger than the finished piece, because the border and the date imprint together consume roughly fifteen percent of the frame, and a square crop applied afterwards will eat into the vignetting that sells the medium. Keep the vignette inside the render rather than adding it in post — a generated vignette follows the frame's own chemistry, while a post vignette looks stuck on top.
Export at the final square size you need, then compose the border and the stamp in any editor at that same size.
Settings that keep a set looking like one roll
Reference image: attach an approved frame and change only the scene clause, which carries the colour response, the vignette, and the grain pattern forward for you. Batch size: four at a time, because a run rendered at mixed settings reads as two different cameras. Ratio: stay at 1:1 for the entire run.
What an instant film set costs in credits
Budget by pass again. Scout: four cheap flux-2 frames to test whether a scene works in this medium at all, since a scene that depends on fine detail often collapses into mush under heavy grain. Lock the chemistry: one gpt-image-2 frame to settle the halation and dye-bleed wording. Produce: two renders each on the scenes you kept, which is what the set actually needs. A six-image run lands around ten to twelve renders. On Ofrai the whole thing draws on a single credit balance.
The saving move is doing the scouting pass at small resolution — grain and vignette read perfectly well at 512 pixels, so never pay full size to decide something visible at thumbnail size.
Matching a stock description to each scene
Different stocks describe different scenes, and describing the stock is what stops a series from looking like one flat filter. Warm reds and skin: "a warm colour negative with slightly lifted reds and soft highlight roll-off." Greens and foliage: "colour negative with clean greens, mild cyan in the shadows, higher overall saturation." Night and neon: "a slower emulsion with pronounced grain, cyan-shifted shadows, and halation on every bright source." Black and white: "panchromatic monochrome, strong grain, deep blacks that still hold detail, no colour cast."
Assign a stock per scene rather than one stock for the whole set, and describe its behaviour instead of its era — "colour negative with cyan shadows" survives a re-roll, "film from the 1980s" does not.
How this differs from a general editor or a retro filter
A general photo editor is asked to change what is in the picture: remove an object, replace a background, correct an exposure. It is not trying to reproduce a specific medium. A retro filter lays a global tint over an otherwise unchanged image, which is precisely what this page argues against. An instant film generator is asked to reproduce the physical behaviour of one film stock — vignette, halation, dye bleed, uneven flow, grain distribution — with chemistry described rather than mood.
Use a general editor when the content needs fixing and the look is incidental. Use this page when the look is the subject and the content is simple enough that the artefacts read as authentic.
Examples
FAQ
- How do I make an AI photo look like real instant film?
- Describe the chemistry rather than the mood: dye bleed around highlights, uneven developer flow across the frame, lifted blacks, fine grain in the highlights and coarser in the midtones, and halation glowing around bright light sources. A single phrase like "retro film look" only produces a warm filter.
- Should the date stamp be generated or added afterwards?
- Add it afterwards. Generated stamps usually contain malformed characters and inconsistent placement, which is the fastest way to look fake. Export the 1:1 frame, add the white border, and set the imprint in a small monospaced font at the bottom right with a slight amber tint.
- How do I get halation around light sources?
- Name halation directly in the prompt as a bright bloom with a red-orange glow around the window, lamp, or flash. If it is still missing, the model has probably produced a warm colour cast instead, which is a grade rather than a film characteristic — specifying the glow and its colour is what produces the effect.
- Can I generate a whole set in a consistent film style?
- Yes. Write the chemistry clause once and change only the scene between renders, keeping the film description byte-identical. A night flash frame, a beach daylight frame, and a kitchen window frame from the same skeleton read as the same camera and the same stock.
- Which Ofrai model handles film artefacts most accurately?
- gpt-image-2 follows physical descriptions most literally, which suits named artefacts such as halation and dye bleed. nano-banana-pro is most reliable when reusing one long film block across a set, flux-2 is the cheapest test pass, and seedream-5 tends cleaner and may need the halation clause emphasised.
- Why does my instant film result look like a warm filter instead?
- The prompt probably described a mood instead of a process. Add the missing physical terms — uneven developer flow, lifted blacks, colour bleed at highlights — because those are what the engine actually renders. A warm filter is a colour grade; instant film has structural artefacts that a grade cannot reproduce.
Related generators
- AI Black And White Photo Generator
- AI Liminal Space Image Generator
- AI Luxury Photo Generator
- AI Minimalist Photo Generator
- AI Old Money Photo Generator
- AI Caricature Generator
- AI Chibi Character Generator
- AI Classical Portrait Generator
- AI Cozy Anime Art Generator
- AI Cozy Winter Wallpaper Generator
- AI Crayon Drawing Generator
- AI Oil Painting Generator